Case Study: Treating M-Shaped Lips

By Dr Sarah Hart / 22 Dec 2021

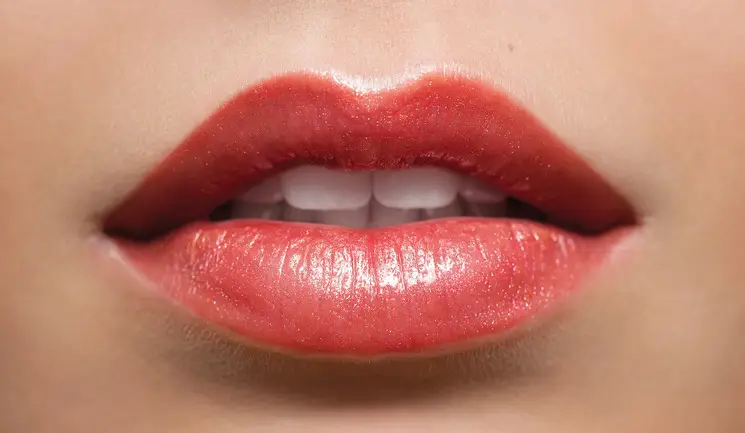
Dr Sarah Hart presents a case study of a challenging lip that uses simple assessment and treatment techniques

Even though lips are a commonly treated area, many injectors find them to be technically demanding. This challenging case study of an M-shaped, inverted, retruded lip with a long philtrum and perioral volume loss demonstrates how simple assessment and treatment techniques can be perfectly adequate for complex cases. I find assessment at animation (kiss and smile) to be especially useful.

Patient presentation

A 44-year-old Caucasian female requested augmentation of her lips. She had always felt they were small and had noticed their size decreasing further in recent years. She requested a natural result where no one would suspect she’d had filler. Previously, she had undergone botulinum toxin treatment to her upper facial lines, but she had never had filler before. Her budget was limited to 2ml of dermal filler per treatment.

Assessment of the lips

The patient’s lips appeared small and inverted, her medical tubercle protuberant, and her lateral tubercles undersized, giving an M-lip shape appearance.

Her upper lip was smaller than ideal compared to the lower lip and there was a prominent medial section of the vermilion border, which jutted out over the lower lip giving a slightly beaky appearance on oblique view (Figure 1).

Profile view revealed that both lips were retruded – the lower more so than the upper. I find assessment on animation very useful as it reveals underlying deficiencies that are not visible at rest, allowing them to be addressed with filler for best results.

The patient’s smile revealed a narrow dental arch with crowded teeth angling posteriorly, showing there was a lack of bony support and therefore filler should be placed at periosteal level beside the piriform aperture. The kiss position (Figure 3) revealed lip lines and creasing at the oral commissures, indicating a need for filler to support these areas. More useful information was revealed at kiss on profile view, with multiple creases showing a marked lack of soft tissue support at the chin and a flattened, lengthened philtrum.

The assessment revealed multiple needs. The patient’s M-shaped lips needed to be everted without augmenting the medial tubercle or the upper vermilion border, as it could jut out and look unnatural. The lower lip needed to be brought forwards more than the upper lip. The surrounding volume loss also needed addressing.

Doing all these things with the patient’s budget restriction of 2ml of filler posed a challenge. If I treated only the surrounding areas, she would be disappointed with the lack of lip augmentation, but if I put all the filler in her lips, it would look unnatural. I needed to share the 2ml between lips and the surrounding areas. However, 2ml wasn’t enough for full correction.

As a solution, I suggested two treatments of 2ml of Juvéderm Ultra spaced six months apart to build the result. The patient agreed to this plan which fitted her budget and wish for a discreet treatment.

The treatment

Firstly, I applied numbing cream to her lips. Next, I placed 0.25ml of Juvéderm Ultra per side, both deep on periosteum and subcutaneously, near the piriform aperture. I chose a 25 gauge 38mm cannula to allow me to distribute filler in both planes using one entry point. This reduced the nasolabial fold and provided a foundation to help evert the lips. The lignocaine in the filler also supplied anaesthesia to the nerve fibres travelling to the sensitive upper lip.

To evert her M-shaped lip, I did not place any filler at the prominent medial tubercle. I augmented the lateral tubercles only, using first horizontal threads and then vertical threads in a crosshatched pattern, placed very superficially in the submucosal plane. I believe each tiny linear thread acts like a prop to evert the lip.

I did not inject directly into the vermilion border. I prefer to enhance the vermilion border by injecting the red vermilion just below the border, massaging the filler upwards to create a crisp edge. In my experience, this reduces the possibility of a wide, bulky border that can occur with direct injection into the vermilion border, especially when treatments are repeated a few times a year.

My entry point for the vertical threads in the upper lip differs from other injectors. I enter from the wet dry border and move the needle upwards towards the vermilion border before placing a retrograde thread of filler. To my mind this has several advantages; I find it easier to stay in the correct submucosal plane, avoiding the deeper plane where the superior labial artery typically lies. I prefer not to inject through the vermilion border as it may encourage injectors to deposit a significant amount in the border which can spread over time, giving the border an unnaturally bulky appearance. I also find patients tolerate it better as numbing cream is absorbed more effectively by the lip tissue compared to the vermilion border, and the lignocaine from the horizontal threads also offers some anaesthesia to the entry point.

To evert and project the lower lip, I placed two boluses at mid-depth with a constantly moving needle on either side of the midline, lined up with the GK (Glogau-Klein) points of the upper lip.1 Overlying this I placed superficial submucosal linear threads to add extra eversion. It is theorised that keeping the needle constantly moving minimises the chance of depositing a large volume of filler into an artery.1,2

I treated volume loss at the marionettes and mental crease using multiple mini boluses, as shown in Figure 4. I find this a very useful technique that is ideal for beginners, as the result can be built little by little. I decanted the filler into a 0.3ml Becton Dickinson syringe with a 31 gauge 8mm needle. This is the ideal length for reaching the subcutaneous fat layer3 and the small needle size minimises pain and bruising. It should be noted that decanting filler in this way is off-label.

To determine exactly where to place the small boluses, I asked the patient to purse her lips periodically during treatment, pinching with my fingers to help me find the areas requiring support. It was a simple task to gradually fill the creases, injecting the filler in multiple mini boluses. I used micromovements of the needle tip as it is theorised this can minimise the chance of depositing a significant volume of filler intravascularly.2

In my experience, this technique works best with fillers that lift with their cohesivity rather than hardness, such as Juvéderm Ultra or Belotero Balance.

Post treatment

The patient was provided with written post-care advice which included education about the symptoms of vascular occlusion. Happily, she experienced no side effects and was delighted with treatment. Unfortunately, the unexpected COVID-19 lockdown in New Zealand disrupted an in-person follow up so a phone appointment was arranged. The patient indicted she would like to continue treatment to maintain her result.

Case study results

I treated this case using simple techniques: injecting filler superficially into the lips to evert them and observing where creases appeared in the chin and oral commissures on kiss animation, filling those creases directly with small boluses of filler. Just these two techniques were able to improve a variety of issues.

Placing filler in the lips everted them, increased their size and projected them anteriorly. The eversion of the upper lip also improved the philtrum, changing it from a flat, long shape to a concave curve (Figure 5). This can be seen best at kiss on profile view. The philtrum lengthens and flattens with ageing and restoring the youthful concave curve has a powerful effect on the appearance of the entire perioral area. To me, it was one of the most satisfying effects of treatment.4,5

Treating the mental crease and oral commissures with multiple small subcutaneous boluses appears to have helped project the lower lip into a better position relative to the top lip. It may also have reduced the muscular action of orbicularis oris and mentalis muscles, further improving the appearance of the area.

I believe complex cases such as this one can be well managed with careful assessment, especially on animation, and simple techniques.

Upgrade to become a Full Member to read all of this article.